Folder & file templates
Folder and file templates are essential in project-based organizations for consistency and time savings. They ensure compliance, reduce risks, and enhance collaboration with a familiar structure. Templates maintain quality by consistently capturing key details and support scalable processes as organizations grow.
Seamless supports the provisioning of files and folders from a centralized template storage location into the General Channel of your Teams. Follow this guide to configure this feature in your Teams environment.
Configuration
Prepare the centralized template storage location
To enable the provisioning of folders and files within a Team, these templates must first be made available at a central location on a SharePoint site or within a Teams environment.
For our example, we have set up a SharePoint Communication Site named Templates and added a sample project structure to it. Create a folder structure according to your needs, and feel free to add files as well.
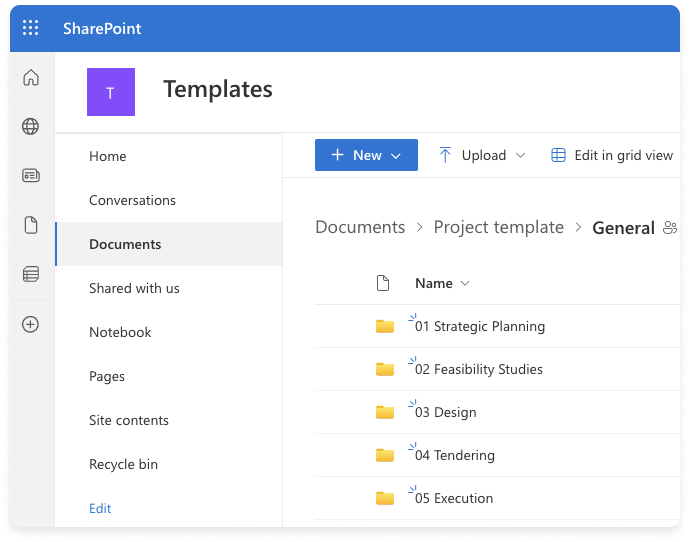
Make sure to create the folder and file structure within the General folder in the original storage location.
Copy sharing link
In the following steps, we'll copy the correct link to the source using the sharing dialog to paste it into the template configuration in the Seamless Admin Center.
To copy the link, navigate to the location of the General folder and click on its sharing icon.
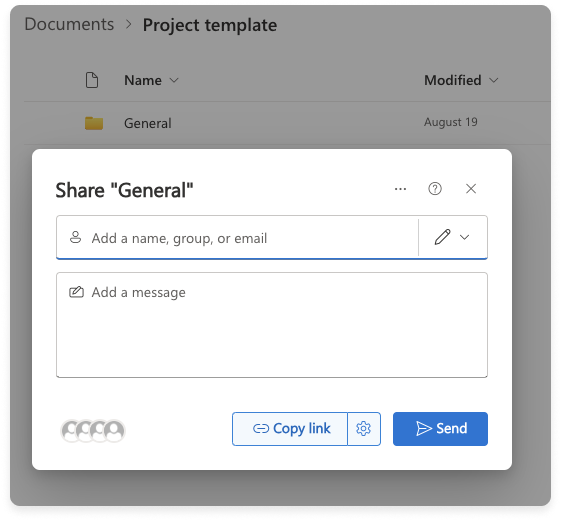
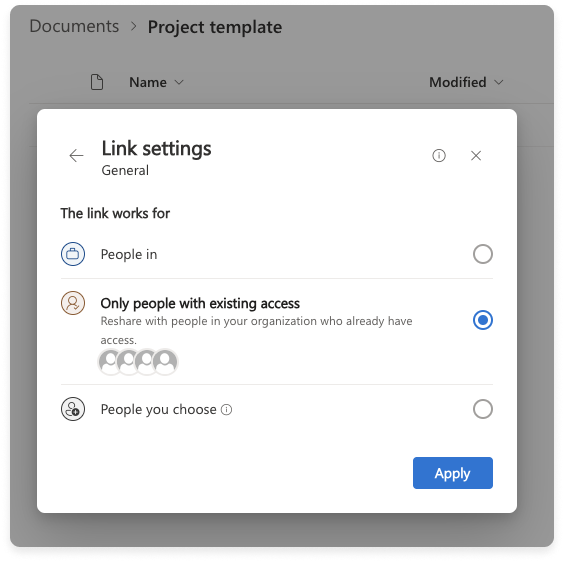
In the sharing dialog, click the settings button next to the "Copy link" button to open the Link settings view. Then, select the "Only people with existing access" option. Apply your settings and click now the "Copy link" button.
Add the link to the template
In the Seamless Admin Center, navigate to the template you use to provision the selected folders and files. At the bottom of the provisioning section, you will find a field to enter the path to your folder and file templates. Insert the copied source path. After inserting, ensure the link is properly formatted, as shown in the screenshot below. After adding the url, save the configuration.

Test configuration
After completing the steps above, your template will be ready to provision folders and files from the centralized template storage location. Next, create a new Team using the corresponding templates, and then review the results to ensure everything has been set up correctly.
Troubleshooting
If the folders and files aren't provisioned, check the link and remove any parts like :f:/r or ?csf=1&web=1&e=Wgds2n from the source url.
The path should look like this: https://<YourTenant>.sharepoint.com/sites/Templates/Shared%20Documents/Project%20template/General
Also, ensure that the folders and files are stored in a folder named General.