Example: Inform guests about inactivity
This guide shows how to use an Azure Logic App to extend the inactive guest removal workflow by sending a custom email about the company's inactivity policy.
Create Logic App
Prerequisites
Before configuring the Logic App, it must first be deployed in Azure. The steps to create a Logic App are explained in the following guide:
Create an example Standard Logic App workflow using the Azure portal (opens in a new tab)
Create your workflow
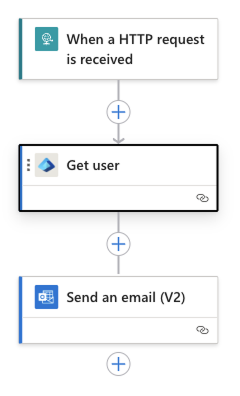
In this example, the workflow includes the following steps:
- Trigger
- Get user
- Send email
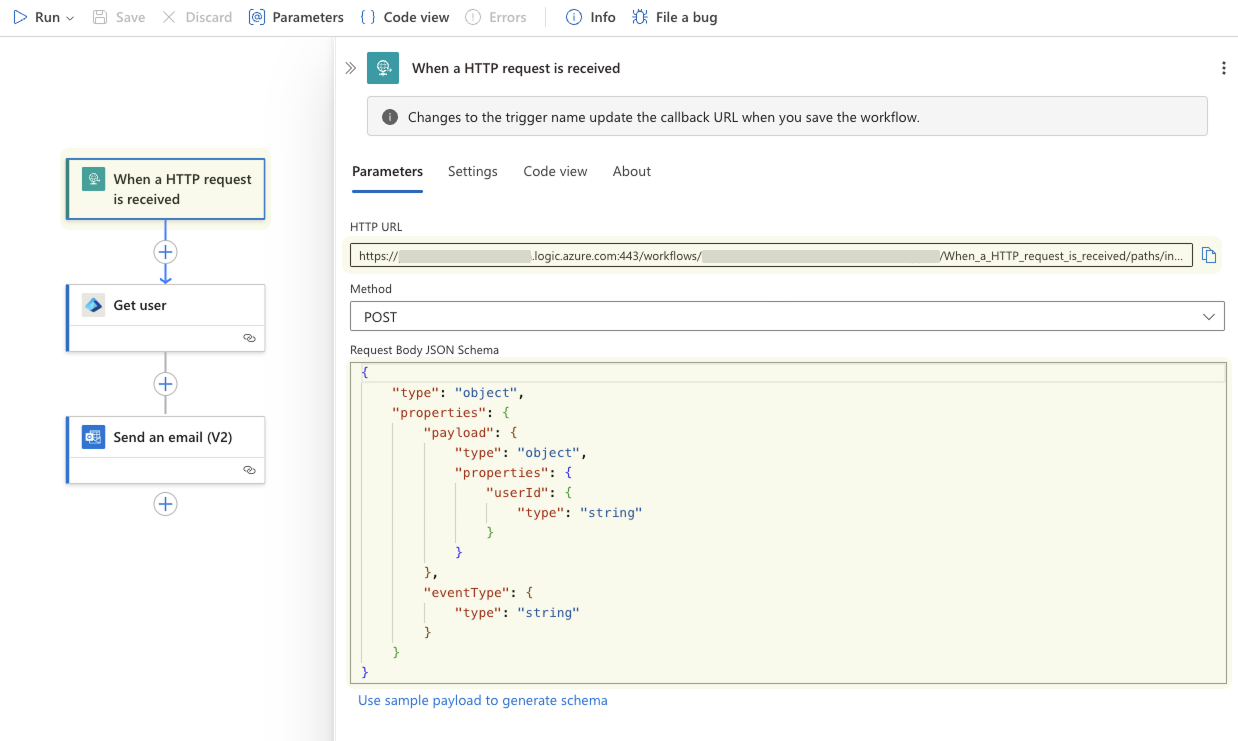
Configure trigger
This example workflow starts with the built-in Request trigger named When a HTTP request is received. This trigger creates an endpoint that other services or logic app workflows can call and waits for those inbound calls or requests to arrive. Built-in operations run natively and directly within the Azure Logic Apps runtime.
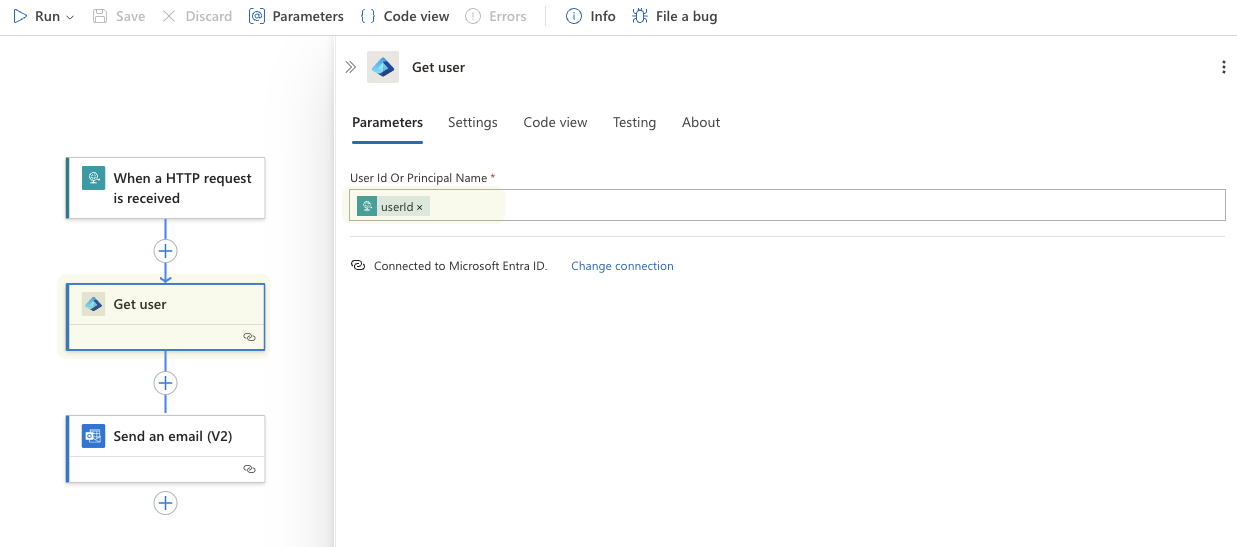
Get user
Now add the Get user step and add the userId to the parameters. This will return the corresponding user object.
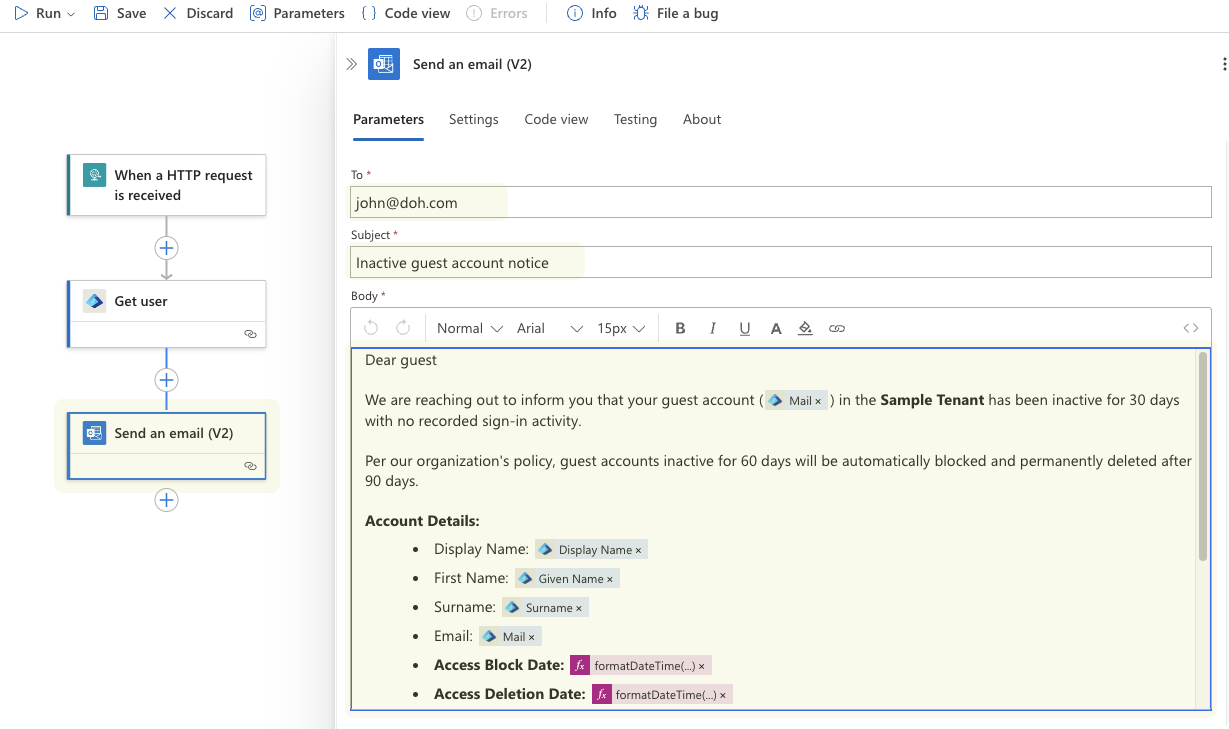
Send email
In the next step, configure your custom email message using the Send an email (V2) step. Use attributes from the corresponding user object in the body and apply functions to dynamically calculate the access block and deletion dates based on today's date.
Connect your workflow to Seamless
- In Seamless, navigate to Guest governance > Templates > [Template] > Removal > Inactive guests.
- Expand the Webhook settings below the "Status Inactive" field.
- Copy the HTTP URL from the trigger step into the webhook Url field.
- Save your changes.
Perform a test run
- Ensure a guest account with a webhook: In Seamless, verify that a guest account is assigned to a template containing the webhook.
- Reset user status: Navigate to Guest Governance > Governance Checks and reset the status of all users.
- Trigger the webhook: Run the Governance check to activate the webhook.
Status monitoring
To monitor, if the notification was successfully submitted, navigate to Logs > Webhooks
